
0
Owner's of the Panasonic Camcorder Memory Card Camera-Recorder gave it a score of 0 out of 5. Here's how the scores stacked up:

– 83 –
Chapter 4 Adjustments and Settings for Recording — Adjusting and setting the viewnder
Adjusting and setting the viewnder
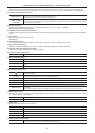
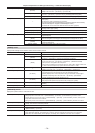
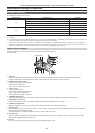
Available viewnders
The viewnder can be used on the camera.
Recording mode Viewnder image Viewnder
HD
Camera image
l
Playback
l
Return image (HD SDI)
l
HD SDI input
l
SD
Camera image
l*
1
Playback
l*
2
Return image (SD SDI)
l*
3
SD SDI input
l
Return signals that can be displayed in the viewnder and SDI input signals are signals of the recording format currently set to the camera.
*1 HD signals
*2 When [480-59.94i] or [576-50i] is selected in the main menu → [SYSTEM] → [SYSTEM MODE] → [LINE&FREQ], and camera image and playback image are
switched, the image in the viewnder is sometimes temporarily disrupted. This is not a malfunction.
*3 If [480-59.94i] or [576-50i] is set in the main menu → [SYSTEM] → [SYSTEM MODE] → [LINE&FREQ], and [INT] is set in the main menu → [I/F SETUP] →
[GENLOCK] → [GENLOCK], the image is sometimes disrupted in the vertical direction when the return video image of the SDI input signal is checked in the
viewnder. This phenomenon is not a malfunction. Disruption can be eliminated by setting [GENLOCK] to [SDI IN].
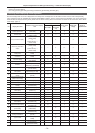
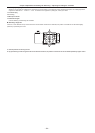
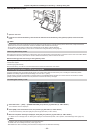
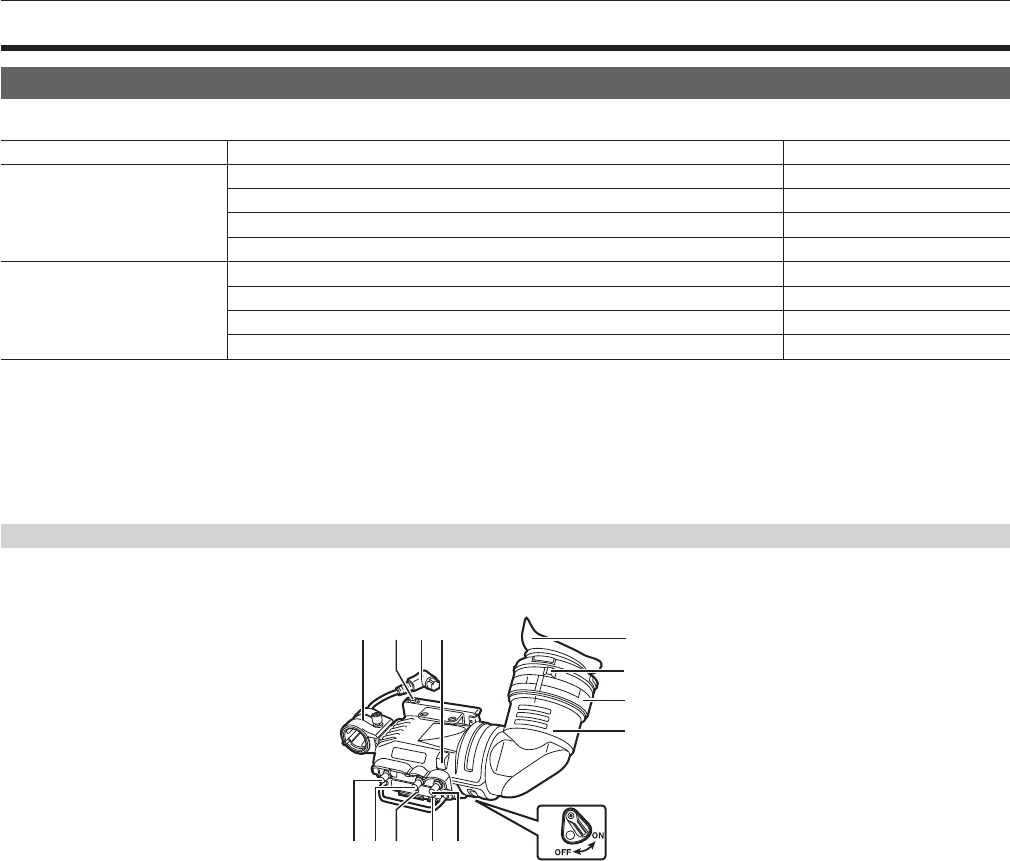
Names of parts in viewnder
For details on method of use, refer to the Operating Instructions for the respective viewnder.
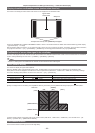
For AJ-HVF21KG
1
2 34 5 6
8
13 14 11 7
10
12
9
1 Viewnder
Black and white video can be viewed during recording and playback. The operation status of the camera, setting related warning displays,
messages, zebra patterns, markers (safety zone marker, center marker), and other information can also be viewed.
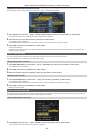
2 <ZEBRA> (zebra pattern) switch
Displays the zebra pattern in the viewnder.
<ON>: Displays zebra patterns.
<OFF>: Does not display zebra patterns.
3 <TALLY> switch
Controls the front tally lamp.
<HIGH>: Makes the front tally lamp brighter.
<OFF>: Turns out the front tally lamp.
<LOW>: Makes the front tally lamp darker.
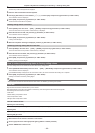
4 <PEAKING> (peaking) dial
Adjusts the contour of the video in the viewnder to make it easier to focus. This does not affect the output signals from the camera.
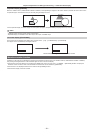
5 <CONTRAST> (contrast) dial
Adjusts the contrast of the screen in the viewnder. This does not affect the output signals from the camera.
6 <BRIGHT> (brightness) dial
Adjusts the brightness of the screen in the viewnder. This does not affect the output signals from the camera.
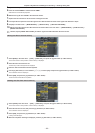
7 Front tally lamp
Operates when the <TALLY> switch is at the <HIGH> or <LOW> position, and lights during shooting. It also ashes in the same way as the [REC]
lamp in the viewnder and displays warnings.
The brightness when it is lit can be switched by the <TALLY> switch (<HIGH> or <LOW>).
8 Back tally lamp
Lights during shooting. It also ashes in the same way as the [REC] lamp in the viewnder and displays warnings. The back tally lamp is hidden
when the lever is pushed towards the <OFF> side.
9 Eyepiece
Do not point the eyepiece directly at the sun. Doing so might damage the devices inside.


Find Your Products By Category
Please Login
