
0
Owner's of the Panasonic Camcorder Memory Card Camera-Recorder gave it a score of 0 out of 5. Here's how the scores stacked up:

– 115 –
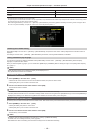
Chapter 6 Thumbnail Operations for Clips — Thumbnail operations
@@
NOTE
t In clip division and copying using the text memo, the area copied may be automatically modied and copied depending on the recording method of the
clip.
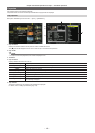
Deleting clips
1
Use the cursor buttons to move the cursor over the clip to be deleted, and press the <SET> button to select the clip.
2
Select [DELETE] in the main menu → [CLIP] and press the <SET> button.
3
Use the cursor buttons and the <SET> button to select [YES].
The clip is deleted. All selected clips (in blue-green frames) are deleted by this operation.
@@
NOTE
t To interrupt the deletion process, press the <SHIFT> button + <EXIT> button or the <SET> button to cancel the operation. Once a clip is deleted, it
cannot be restored even if the deletion process is aborted.
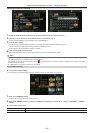
Restoring clips
You can restore clips that were made defective as a result of sudden power-down during recording or removal of the P2 card being accessed.
1
Use the cursor buttons to move the cursor over the clip to be restored (defective clips are indicated by defective clip marks) and
press the <SET> button to select the clip.
2
Select [REPAIR] in the main menu → [CLIP] and press the <SET> button.
3
Use the cursor buttons and the <SET> button to select [YES].
This restores the clip.
@@
NOTE
t You can restore clips with yellow defective clip indicators. Delete clips with red defective clip indicators. If the clips cannot be deleted, format the P2
card.
During restoration of the clips, however, the defective clip indicator may change from yellow to red, and result in the inability to restore the clips.
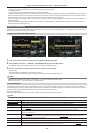
Reconnecting incomplete clips
Incomplete clips may be generated when clips recorded on multiple P2 cards (connected clips) are separately copied from each card. The reconnection
function generates one clip (the original, connected clip) from incomplete clips.
1
Use the cursor buttons and the <SET> button to select incomplete clips to be reconnected.
Usually, thumbnails of incomplete clips (clips with [ ] indicator) are displayed in a line.
2
Select [RE-CONNECT] in the main menu → [CLIP] and press the <SET> button.
3
Use the cursor buttons and the <SET> button to select [YES].
This reconnects incomplete clips.
@@
NOTE
t Incomplete clip indicators will remain displayed when only some clips are reconnected, unless all the constituent clips of the original clip are
reconnected.
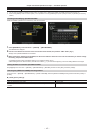
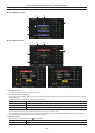
Copying clips
Selected clips can be copied to a P2 card or a connected USB storage device in the desired slot.
1
Use the cursor buttons to move the cursor over the clip to be copied, and press the <SET> button to select the clip.
2
In the main menu → [CLIP], move the cursor from the [COPY] list over the destination and press the <SET> button.
fWhen multiple clips are selected, the number of selected clips is displayed after pressing the <SET> button.
fIf the copy destination is a storage device, select the copy destination properties.
3
Move the cursor to [YES] in the confirmation message and press the <SET> button.
This starts copying of the clip.
4
When the completion message appears, press the <SET> button.
@@
NOTE
t Turning off the power or inserting/removing a card during copying may damage the P2 card. If you accidentally make these mistakes, it can result in
defective clips. After deleting the defective clips redo copying.
t Copying is not performed when the following error messages are displayed.
- [LACK OF CAPACITY!]
Copying could not be performed because the recording capacity of the copy destination is insufcient.
- [UNKNOWN CONTENTS FORMAT!]
Copying could not be performed because a defective clip is selected.


Find Your Products By Category
Please Login
