
0
Owner's of the CHIEF TV Mount CHIEF TV Mount gave it a score of 0 out of 5. Here's how the scores stacked up:

WMA2S Installation Instructions
6
ASSEMBLY AND INSTALLATION
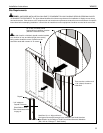
The WMA2S dual stud wall mount accessory can be mounted
to concrete, concrete block, 2" x 4" wood studs (16" on center)
or steel studs. It can be mounted to studs up to 16" apart.
Installing Mounting Bracket
WARNING: ELECTRICAL SHOCK HAZARD! CUTTING
OR DRILLING INTO ELECTRICAL CORDS OR CABLES
CAN CAUSE DEATH OR SERIOUS PERSONAL INJURY!
ALWAYS make certain area behind mounting surface is free
of electrical wires and cables before cutting, drilling, or
installing fasteners.
WARNING: EXPLOSION AND FIRE HAZARD! CUTTING
OR DRILLING INTO GAS PLUMBING CAN CAUSE DEATH
OR SERIOUS PERSONAL INJURY! ALWAYS make certain
area behind mounting surface is free of gas, water, waste, or
any other plumbing before cutting, drilling, or installing
fasteners.
Concrete or Concrete Block
IMPORTANT ! : If installing to a concrete or concrete
block wall, drywall may NOT be attached to the wall.
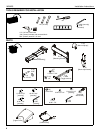
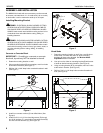
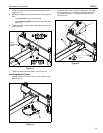
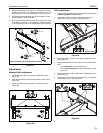
1. Determine mounting location on wall.
2. Using mounting bracket (B) as a template, mark four holes
at the holes in bracket. (See Figure 1)
3. Drill four 3/8" x 3-3/8" deep holes at marked locations in wall.
(See Figure 1)
Figure 1
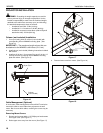
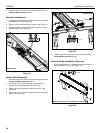
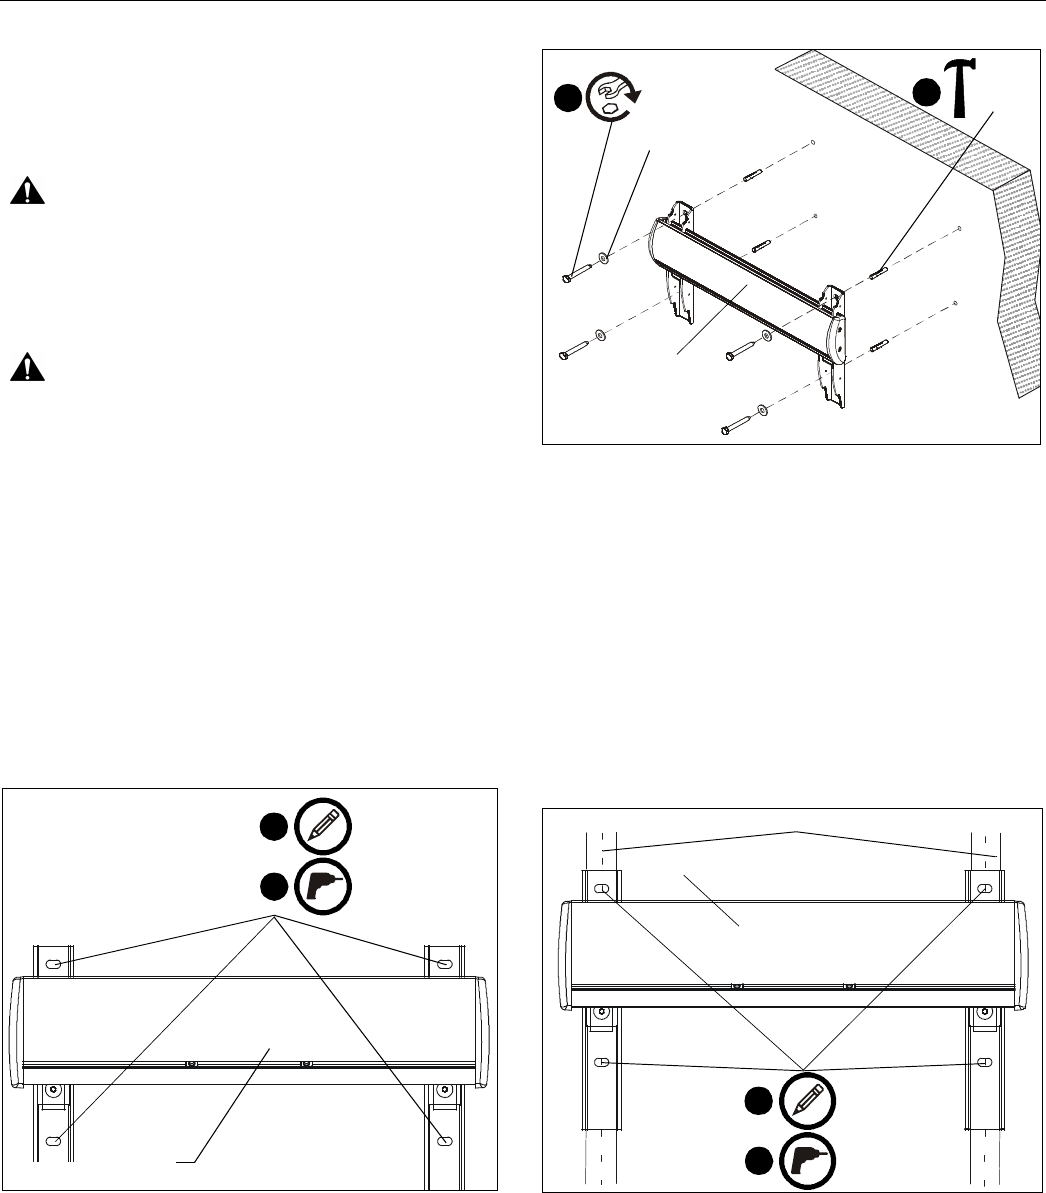
4. Install four concrete anchors (S) into drilled holes. (See
Figure 2)
5. Install four 5/16 x 2-1/2" hex head lag screws (E) through
four 5/16" washers (F), outer holes of mounting bracket (B)
and into concrete anchors (S). (See Figure 2)
Figure 2
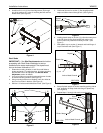
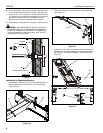
Wood Studs
1. Determine mounting location on wall. Use a stud finder to
locate studs. For studs less than 16" apart, mounting
brackets will have to be adjusted. See Bracket Width
Adjustment section for details.
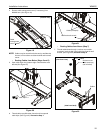
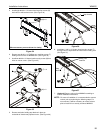
2. Line up inner four holes on mounting bracket (B) with center
of studs at desired mounting location. (See Figure 3)
3. Using mounting bracket (B) as a template, mark four holes
at the holes in bracket. (See Figure 3)
4. Drill four 7/32" x 2-1/2" deep holes at marked locations in
wall. (See Figure 3)
Figure 3
2
3
x 4
x 4
(front view)
(B)
(B)
(E) x 4
5
(S) x 4
4
(F) x 4
(front view)
(B)
Wood studs
3
4
x 4
x 4


Find Your Products By Category
Please Login
