
0
Owner's of the CHIEF TV Mount CHIEF TV Mount gave it a score of 0 out of 5. Here's how the scores stacked up:


WMA2S Installation Instructions
10
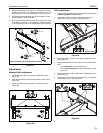
PROJECTOR INSTALLATION
WARNING: Exceeding the weight capacity can result in
serious personal injury or damage to equipment! It is the
installer’s responsibility to make sure the combined weight
attached to the wall mount accessory up to (and including)
the attached component(s) does not exceed:
• Installed in steel stud: 75 lbs (34.0 kg)
• Installed in 2" x 4" wood stud: 150 lbs (68.0 kg)
• Installed in concrete/concrete block (with NO drywall
attached to wall): 150 lbs (68.0 kg)
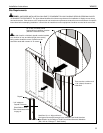
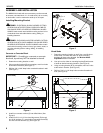
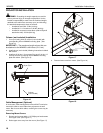
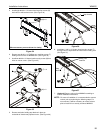
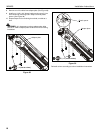
Column (not included) Installation
1. Line up mounting holes on column (not included) with
corresponding hole on WMA2S mounting plate. (See
Figure 16)
IMPORTANT ! : The maximum length column that can
be attached to the WMA2S is 48 inches (121.9 cm).
2. Install column (not included) following instructions included
with column.
3. Install one 5/16-18 x 1/4" set screw (Q) or one 5/16-18 x 1/4"
security set screw (R) through hole in WMA2S mounting
plate and column. (See Figure 15)
Figure 16
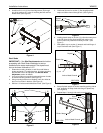
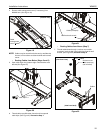
Cable Management (Optional)
In most cases, cable management covers will NOT need to be
removed in order to route cables from projector to the wall
mount. But for some thick cables, removing the covers may be
necessary.
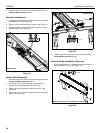
Removing Mount Covers
1. Remove and save two 8-32 x 1/2" Phillips pan head screws
from upper cover. (See Figure 17)
2. Raise upper cover away from the mount. (See Figure 17)
Figure 17
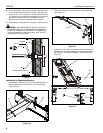
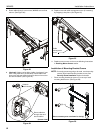
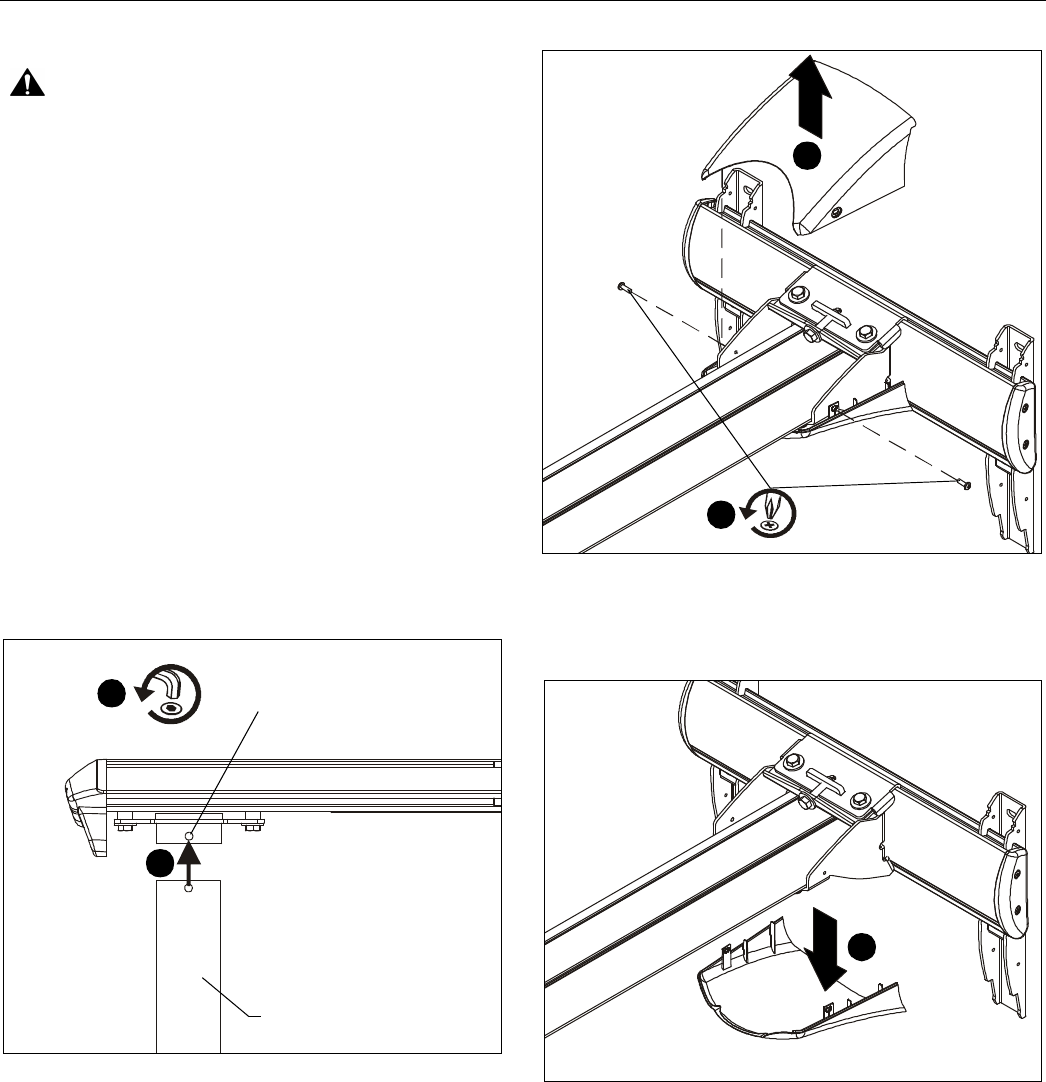
3. Remove lower cover from mount. (See Figure 18)
Figure 18
3
(Q) or (R) x 1
1
Column
(not included)
(side view)
1
(T) x 2
2
3


Find Your Products By Category
Please Login
