
0
Owner's of the CHIEF Water Dispenser CHIEF Water Dispenser gave it a score of 0 out of 5. Here's how the scores stacked up:
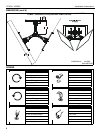

Installation Instructions FCA3U / LCM3U
7
Installing Mount Assemblies and Screens
NOTE: In the following Steps 1-6, parts not designated with a
letter are included with mount assemblies.
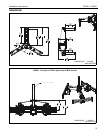
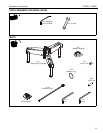
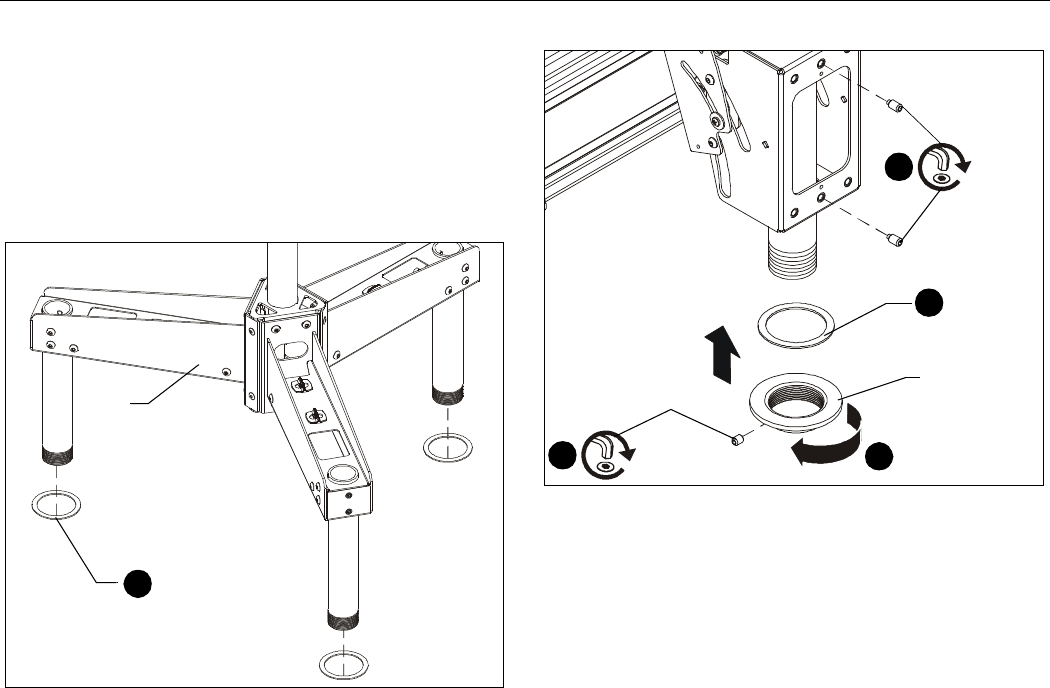
1. OPTIONAL: Slide one rotation ring (D) up onto leg of the
triple ceiling accessory (A). (See Figure 4)
NOTE: The rotation rings only need to be installed if the mount
assemblies will be rotated after installation.
Figure 4
2. Slide mount assembly onto leg of the triple ceiling
accessory.
3. Insert one rotation ring (D) below mount assembly on leg of
the triple ceiling accessory. (See Figure 5)
4. Thread bottom coupling onto leg of triple ceiling accessory
until tight, with a minimum of four threads engaged. (See
Figure 5)
Figure 5
5. Install and tighten one 10-24 x 1/4" set screw into bottom
coupling. (See Figure 5)
6. Install and tighten two 5/16" nylon tipped set screws (E) [OR
two 5/16" set screws included with mount assembly]
through back of mount assembly and against column. (See
Figure 5)
NOTE: The nylon tipped set screws (E) only need to be
installed if the mount assemblies will be rotated after
installation. If no rotation is necessary, use 5/16" set
screws from mount assemblies hardware.
7. Repeat Steps 1 through 6 for remaining mount assemblies.
8. Complete installation following the remaining steps in
the Installation Instructions included with the mount
assemblies.
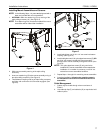
Cable Management
1. Cables may be routed through columns and arms of
FCA3U.
2. Use cable zip clips (F) and cable ties (G) as required to hold
cables in place.
(D)
(A)
1
(D)
2
4
bottom
coupling
5
10-24 x 1/4"
6
(E) x 2


Find Your Products By Category
Please Login
