
0
Owner's of the CHIEF Water Dispenser CHIEF Water Dispenser gave it a score of 0 out of 5. Here's how the scores stacked up:
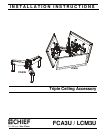

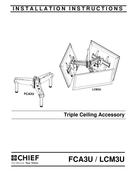
FCA3U / LCM3U Installation Instructions
6
INSTALLATION
NOTE: The following procedure assumes that a UL Listed
CMA ceiling plate or CPA ceiling plate (not included)
and
a 1-1/2" NPT or NPSM following ANSI/ASME
B1.20.1 (Schedule 40, 0.154" minimum thickness steel
or aluminum-ASTM B221) threaded extension column,
or a UL Listed Chief CPA column (not included)
have
been properly installed following instructions provided
with ceiling plate and extension column.
Preparing FCA3U
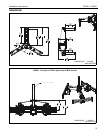
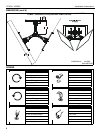
1. OPTIONAL: Add cable zip clips (F) to each arm of triple
ceiling accessory (A). (See Figure 1)
NOTE: Cables may instead be routed through the arms and
columns of the triple ceiling accessory.
Figure 1
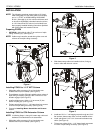
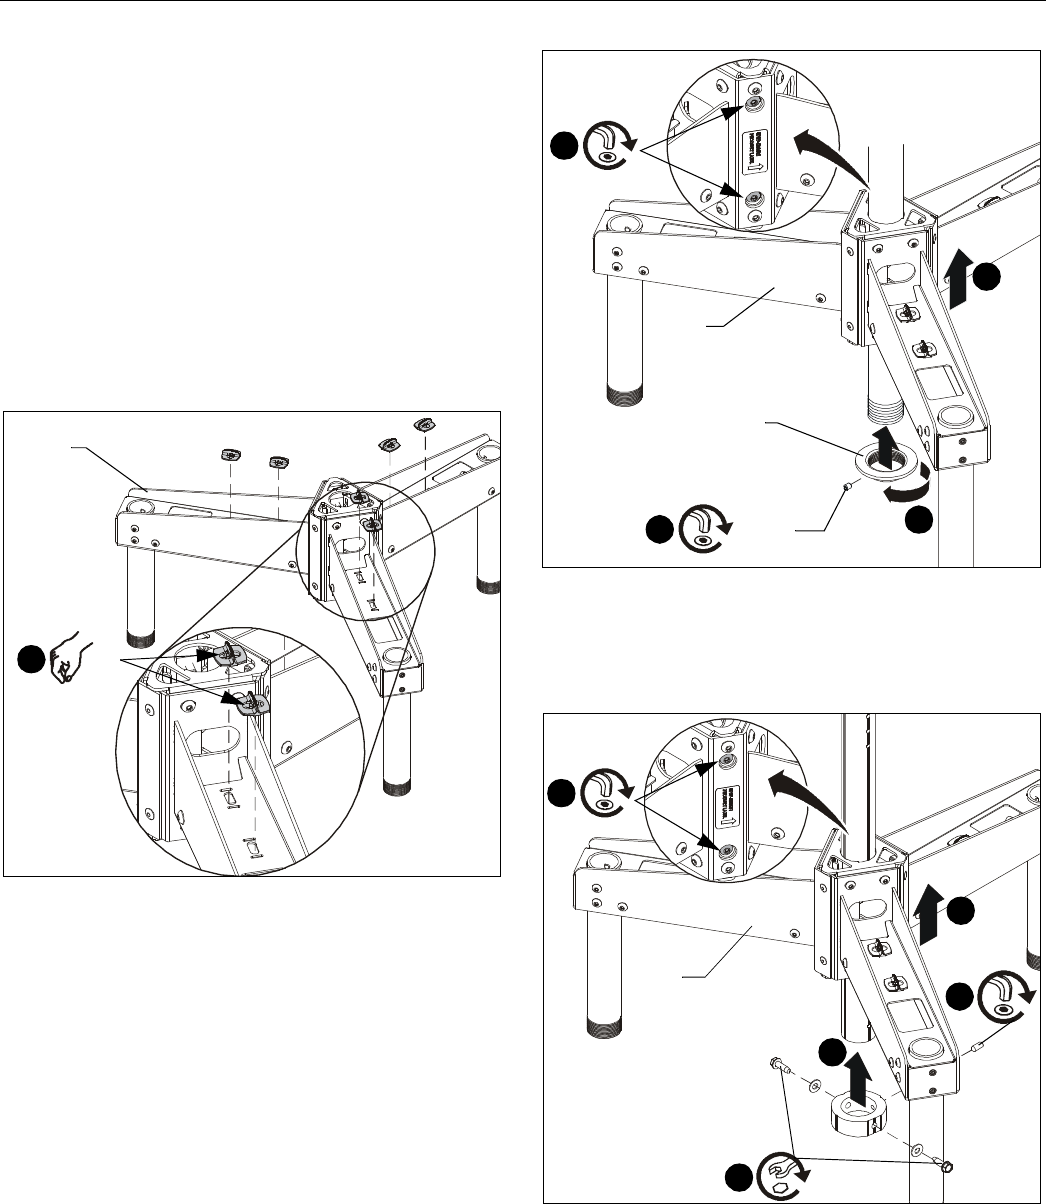
Installing FCA3U to 1-1/2" NPT Column
1. Slide triple ceiling accessory (A) up from below onto
installed column (not included). (See Figure 2)
2. Thread bottom coupling (B) onto installed column at base of
triple ceiling accessory until tight, with a minimum of four
threads engaged. (See Figure 2)
3. Install and tighten one 10-24 x 1/4" set screw (C) into
bottom coupling (B). (See Figure 2)
4. TIghten two existing 5/16 x 1-1/2" button head cap screws
in center of triple ceiling accessory. (See Figure 2)
5. Proceed to Installing Mount Assemblies and Screens
section.
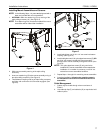
Installing FCA3U to CPA Extension Column
NOTE: In following Steps 1 through 5, bottom stop collar and
hardware is included with mount assemblies.
1. Slide triple ceiling accessory (A) up from below onto
installed column (not included). (See Figure 3)
Figure 2
2. Slide bottom stop collar onto installed column, lining up
holes in collar with holes in column.
Figure 3
3. Install two 5/16" x 1" self-tapping screws through two 5/16"
flat washers, bottom stop collar, and into installed column.
4. Install and tighten 5/16" x 3/4" set screw into bottom stop
collar. (See Figure 3)
5. TIghten two existing 5/16 x 1-1/2" button head cap screws
in center of triple ceiling accessory. (See Figure 3)
(F)
1
(A)
1
3
2
(C) x 1
(B)
(A)
4
1
(A)
2
3
4
5


Find Your Products By Category
Please Login
