

0
Owner's of the CHIEF Pet Fence CHIEF Pet Fence gave it a score of 0 out of 5. Here's how the scores stacked up:


FCA520 Installation Instructions
4
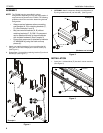
ASSEMBLY
NOTE: The FCA520 may be assembled in various
configurations depending on size and configuration of
component to be placed on the FCA520. The following
guidelines should be used when determining desired
configuration:
• Always use two fasteners when connecting
end brackets (A, B) to retaining brackets (C,
D). (See Examples 1 and 2)
• May use two end brackets (A, B) without
retaining brackets (C, D) ONLY if component
can be attached directly to the end brackets
with included hardware. (See Example 3)
• Ensure that component is attached to brackets
AT MINIMUM by using the hook and loop
pieces (K).
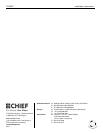
1. Attach one retaining bracket (C) to one end bracket (A)
using two 10-24 x 3/8" Phillips pan machine screws (H).
(See Figure 1)
2. Repeat Step 1 for remaining retaining bracket (D) and end
bracket (B). (See Figure 1)
Figure 1
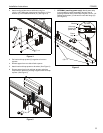
3. OPTIONAL: Attach component directly to end brackets (A,
B) using screws and nuts (not included). (See Figure 2)
Figure 2
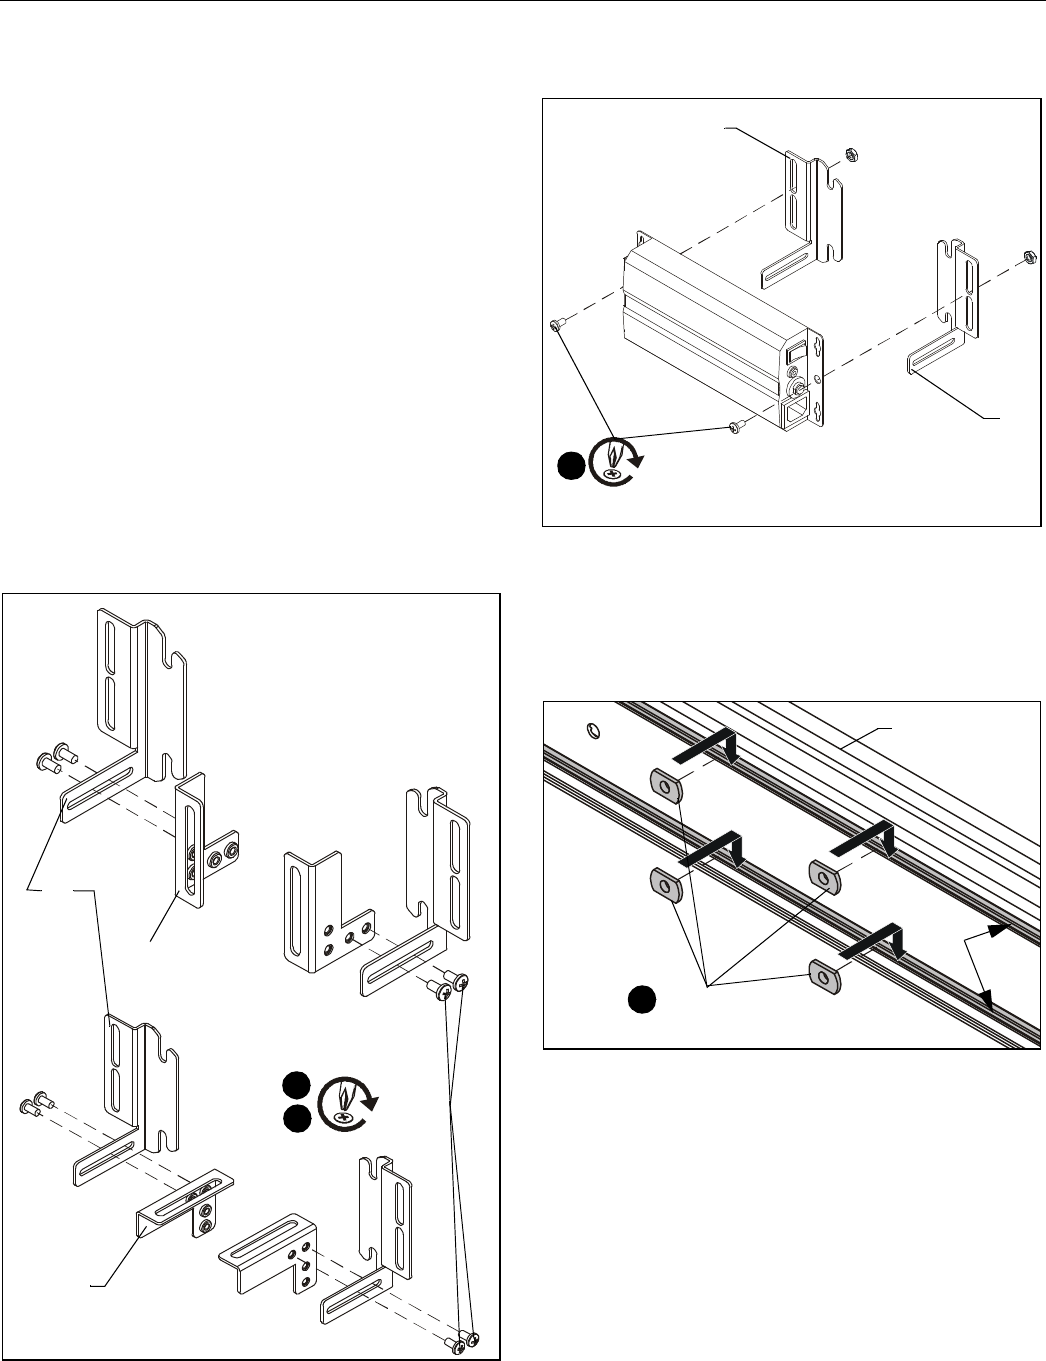
INSTALLATION
1. Insert four 1/4-20 weldnuts (E) into slot in mount extrusion.
(See Figure 3)
Figure 3
1
(D)
(A)
(H) x 4
2
Example 1
Example 2
(C)
Example 3
x 2
3
(A)
(B)
(Hardware not included)
(E) x 4
Extrusion
slot
1


Find Your Products By Category
Please Login
