
0
Owner's of the CHIEF TV Mount CHIEF TV Mount gave it a score of 0 out of 5. Here's how the scores stacked up:
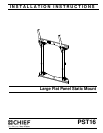
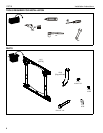


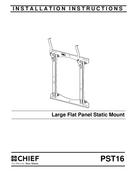
Installation Instructions PST16
5
ASSEMBLY AND INSTALLATION
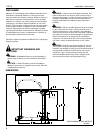
NOTE: The PST16 may be mounted to a wood 2" x 4" stud
wall, 16" on center. The PST16 has a lateral shift of 1"
after attachment to stud wall.
IMPORTANT ! : If the installation of this product requires
OSHPD seismic approval, refer to the OSHPD pre-
approval documents and drawings before beginning
installation. OSHPD documents and drawings are
available at www.chiefmfg.com
, and located on the PST16
product information page.
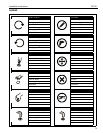
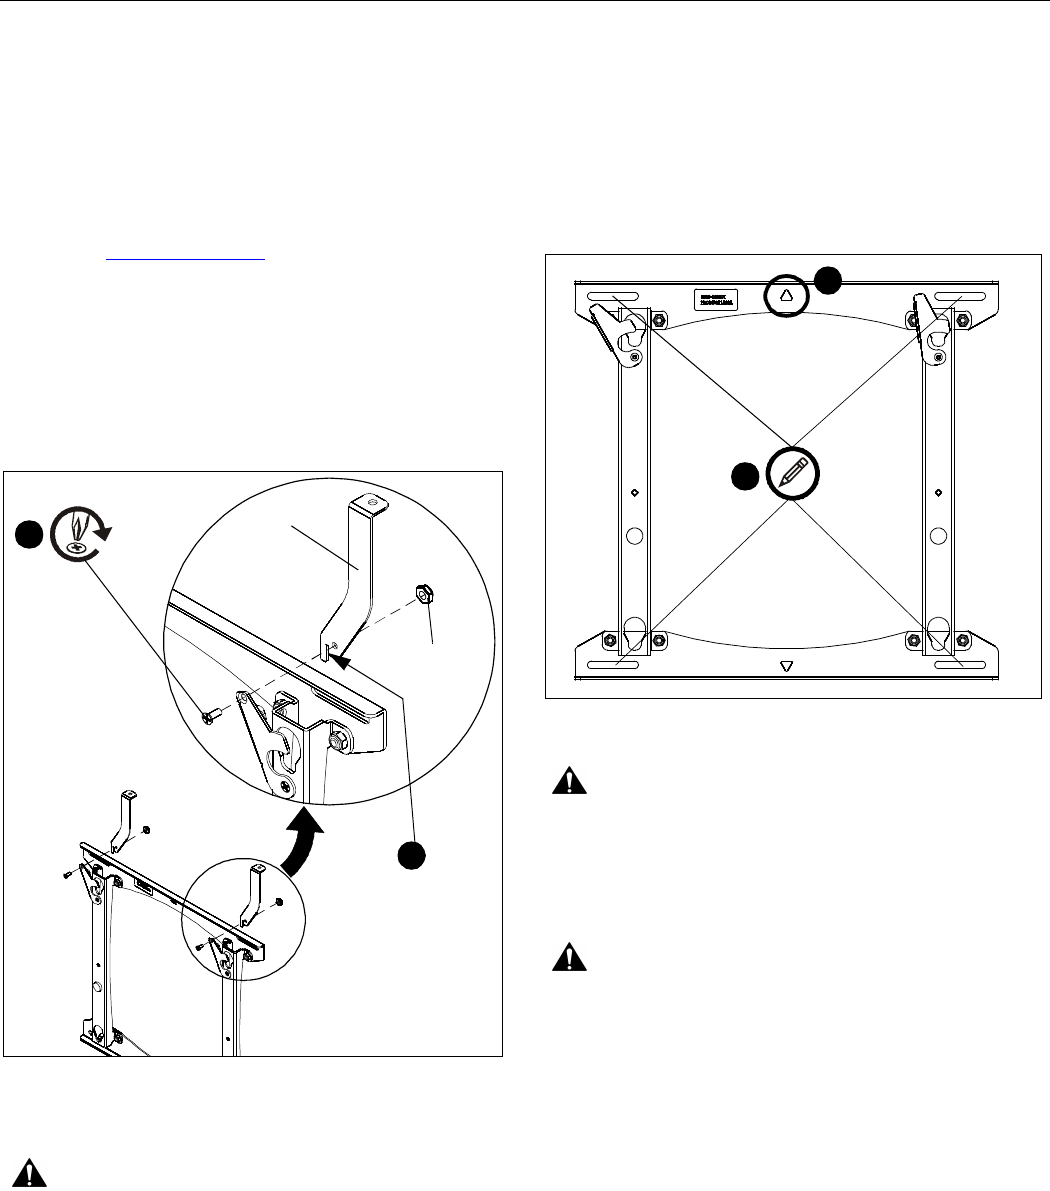
Mount Assembly (Optional)
1. Insert flag extender (B) slot into top of right latching flag.
2. Attach using one 10-24 x 1/2" Phillips undercut machine
screw (C) and one 10-24 nylon locknut (D). (See Figure 1)
3. Repeat with left latching flag. (See Figure 1)
Figure 1
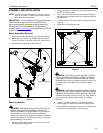
Mount Installation
WARNING: IMPROPER INSTALLATION CAN LEAD TO
DISPLAY FALLING CAUSING SERIOUS PERSONAL
INJURY OR DAMAGE TO EQUIPMENT! It is the installer’s
responsibility to make sure the structure to which this
component is attached can support five times the combined
weight of all equipment. Reinforce the structure as required
before installing the component.
1. Identify a suitable wall location for the PST16 taking into
consideration the display size.
2. Using a stud finder, locate and mark the two studs to which
the PST16 will be installed.
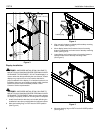
3. Use a nail as a temporary mount and hang the PST16 on
the wall using the triangular hole in the center of the PST16.
(See Figure 2)
4. Level the PST16 and mark the four mounting holes. (See
Figure 2)
5. Remove the PST16 from the wall.
Figure 2
WARNING: ELECTRICAL SHOCK HAZARD! CUTTING
OR DRILLING INTO ELECTRICAL CORDS OR CABLES
CAN CAUSE DEATH OR SERIOUS PERSONAL INJURY!
ALWAYS make certain area behind mounting surface is free
of electrical wires and cables before drilling or installing
fasteners.
WARNING: EXPLOSION AND FIRE HAZARD! CUTTING
OR DRILLING INTO GAS PLUMBING CAN CAUSE DEATH
OR SERIOUS PERSONAL INJURY! ALWAYS make certain
area behind mounting surface is free of gas, water, waste, or
any other plumbing before cutting, drilling, or installing
fasteners.
6. Using a 7/32" drill bit, drill four 2-1/2" deep pilot holes,
ensuring they are centered on the studs. (See Figure 3)
7. Fasten PST16 to wall using four 5/16 x 2-1/2" lag bolts (E)
and four 5/16" flat washers (F). (See Figure 3)
2
(C) x 1
(D)
(B)
1
Flag extender slot
4
3
x 4


Find Your Products By Category
Please Login
