
0
Owner's of the Sharp Flat Panel Television Sharp Aquos LED-LCD TV gave it a score of 0 out of 5. Here's how the scores stacked up:

26
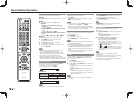
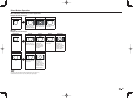
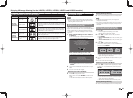
On-Screen Display Menu
Power Control
Power control setting allows you to save energy.
NOTE
• For operating the on-screen display menu, see page 22.
Audio Only
When listening to music from a music program, you
can turn the screen off and enjoy audio only.
NOTE
• The screen image will return to normal when a button
(except those for audio adjustment, such as VOL,
MUTE) is pressed.
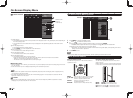
Power Saving
This function allows you to set the Power Saving
level in order to decrease the power consumption
and increase the backlight lifespan.
Standard: Optimizes power reduction based upon
video content. When set to "Standard", "
"
appears on the screen.
Advanced: Optimizes power reduction based upon
video content and engages OPC. When set to
"Advanced",
"
" appears on the screen.
Off: This function does not work.
NOTE
• "Power Saving" does not function when you set AV
MODE to "AUTO" or "DYNAMIC (Fixed)".
• You cannot select a different Power Saving item for
each AV MODE.
When "Power Saving" is set, the "OPC" settings for all
AV Modes will automatically change.
—If you set "OPC" to "On" when "Power Saving" is set
to "Standard", then the "Power Saving" setting will
change to "Advanced".
—When you change the "Power Saving" setting from
"Advanced" to "Off" or to "Standard", "OPC" will be
set to "Off".
—"AUTO" and "DYNAMIC (Fixed)" will remain set to
"Off".
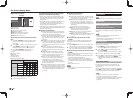
• When "Power Saving" is set to "Standard" or
"Advanced", the Power Saving leaf icon appears to the
left of "OPC" in the Picture Settings menu screen.
• "Power Saving" is not available when the TV is in 3D
mode. (For the LE857U, LE757U, LE755U, LE657U
and LE655U models)
No Signal Off
When this function is enabled, the TV automatically
shuts down if no signal is received for more than 15
minutes.
NOTE
• When it is 5 minutes before the power shuts down,
the remaining time will start to keep appearing every
minute.
• When a TV program fi nishes, this function may not
operate.
No Operation Off
When you enable this function, the TV automatically
shuts down if no operation is performed for more
than 3 hours.
NOTE
• When it is 5 minutes before the power shuts down,
the remaining time will start to keep appearing every
minute.
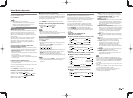
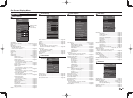
System Options
NOTE
• For operating the on-screen display menu, see page 22.
View Option
These functions are useful for adjusting the audio
and video settings. The View Option functions can
be operated with the remote control unit.
APPS
The application window can be displayed by
selecting "APPS" on the MENU screen.
NOTE
• You can display the application window by pressing
SmartCentral on the remote control unit. (See page
18.)
View Mode
This function changes the screen size.
Select "View Option" on the menu to display the
View Mode menu screen.
The View Mode menu varies depending on the input
source.
NOTE
• You can select View Mode by pressing VIEW MODE
on the remote control unit.
— See pages 20 and 21 for adjusting the video being
input from a TV, other audiovisual equipment, USB-
Video, DLNA-Video or Internet applications.
—
See page 21 for adjusting the video being input from
a PC.
Freeze
Allows you to capture and freeze a moving image
that you are watching.
NOTE
• You can select Freeze by pressing FREEZE on the
remote control unit. See page 18 for details of Freeze
function.
Change Audio
Allows you to change the audio when multiple audio
is available for the program you are watching.
NOTE
• You can change Audio by pressing AUDIO on the
remote control unit. See page 19 for details of Audio
function.
Change CC
Allows you to change the Closed Caption display.
Select "Change CC" on the menu to display the
Closed Caption information.
• The information displayed varies depending on the
program you are watching.
NOTE
• You can change Closed Caption by pressing CC on
the remote control unit. See page 20 for details of
Closed Caption function.
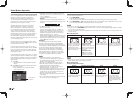
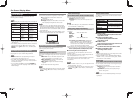
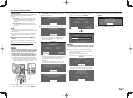
Terminal Setting
Audio Setup
You can output digital audio to an AV amplifi er or
similar device whose DIGITAL AUDIO INPUT terminal is
connected to the DIGITAL AUDIO OUT terminal on the
TV. Please select an audio output format compatible with
the audio format of the program you are watching and
the equipment connected.
PCM: For connecting to equipment that does not
support Dolby Digital and DTS. The same audio
(main, sub, or main/sub) as the audio of the
program being viewed is output.
2-channel audio with a sampling rate of 48 kHz or
less is output as linear PCM audio.
Bitstream: For connecting to an audio system that
supports Dolby Digital and DTS. Audio is output
through both the main and sub channels.
NOTE
• Analog channel audio and video input audio are output
in PCM mode even when "Bitstream" is selected.
• PCM digital input signals are output in PCM mode
even when "Bitstream" is selected.
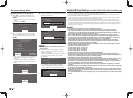
Input Skip
This setting allows you to skip the TV, HDMI or PC
IN Input ("TV", "PC IN", "HDMI 1", "HDMI 2", "HDMI
3" and "HDMI 4") on the Input Selection operation.
NOTE
• If you connect external equipment to an HDMI
IN terminal which you have set to be skipped, a
notifi cation message appears on the display when
a signal is received from the connected external
equipment. Press "Yes" to reset the related skipping
setting so that the input terminal becomes available.


Find Your Products By Category
Please Login
