
0
Owner's of the Sharp Flat Panel Television Sharp Aquos LED-LCD TV gave it a score of 0 out of 5. Here's how the scores stacked up:
9
QUICK REFERENCE
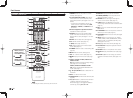
QUICK INSTALLATION TIPS
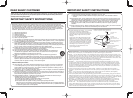
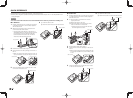
1
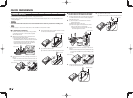
Attach your antenna to the back of the television.
(See page 10.)
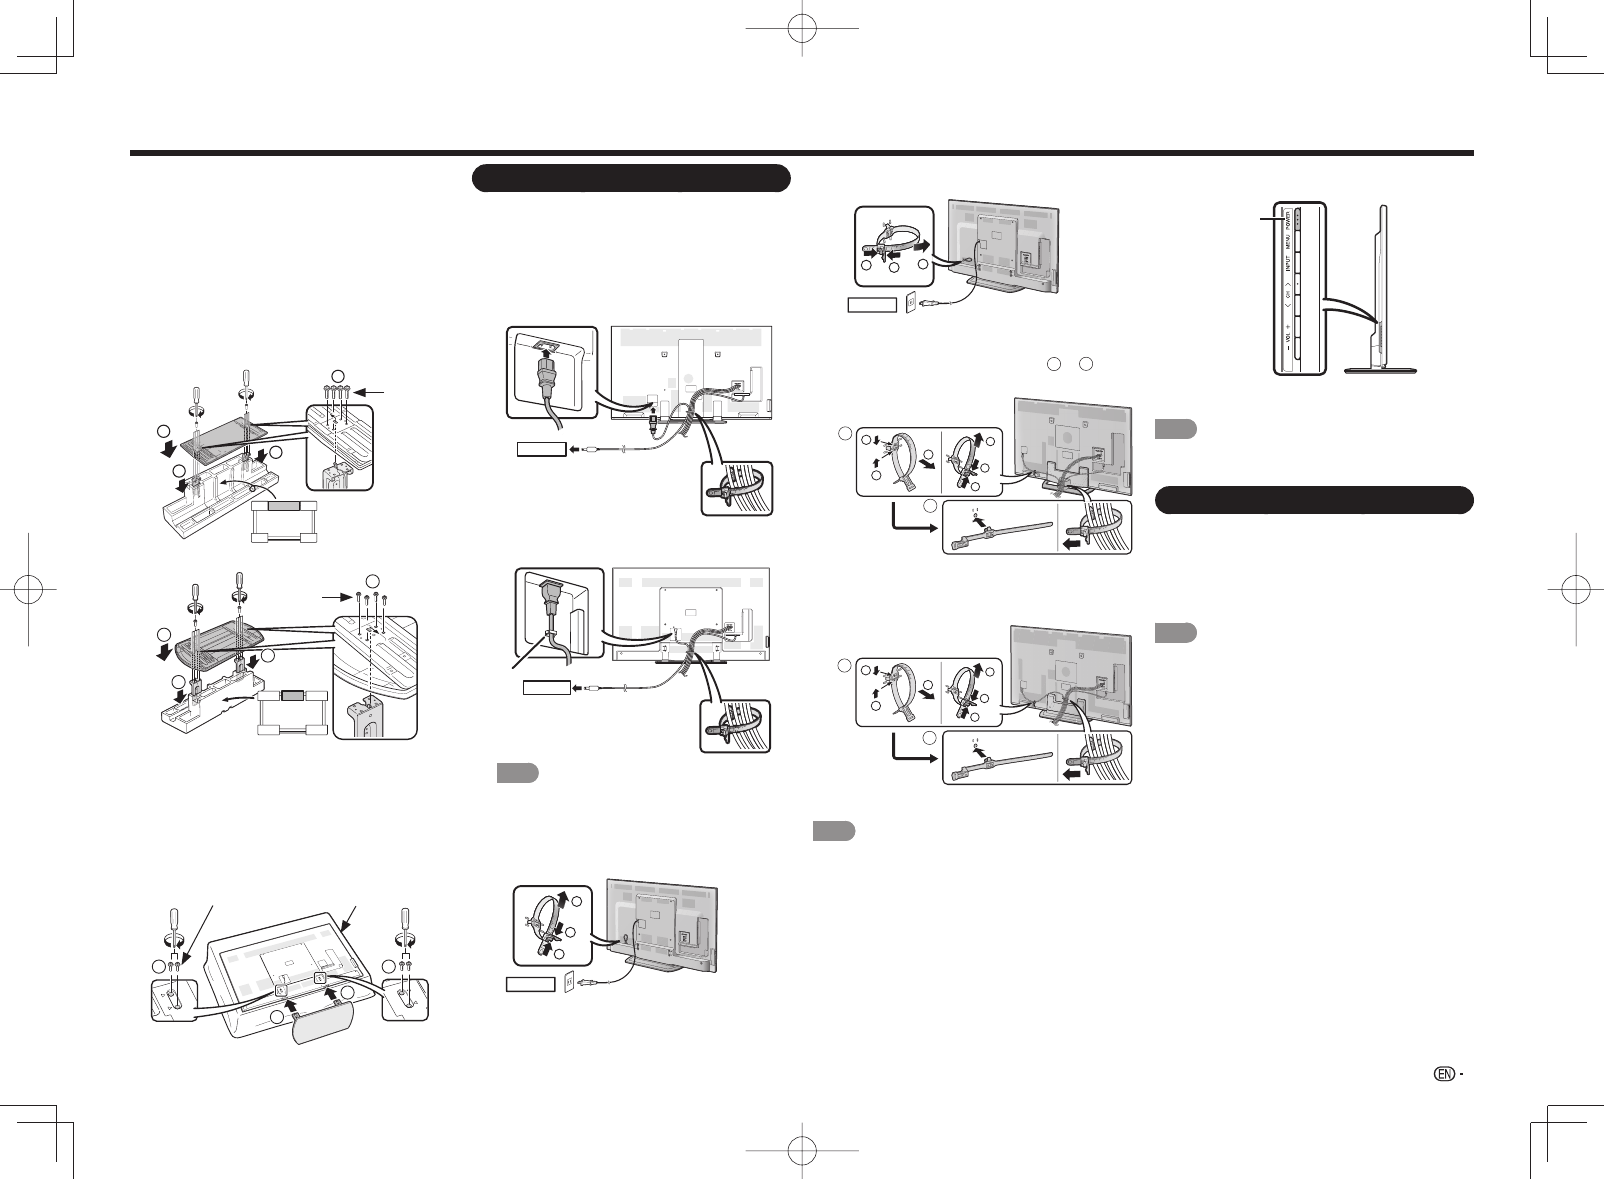
2
Connect the AC plug for the television into the
AC outlet.
• Place the TV close to the AC outlet, and keep the
power plug within reach.
■
LC-80LE857U/LC-80LE757U
AC outlet
■
LC-90LE657U/LC-80LE657U/LC-80LE650U/
LC-80C6500U
AC outlet
*1
NOTE
• *1: Be sure to use the clamp to prevent the AC
cord from being unplugged.
(Except for LC-90LE657U)
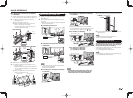
■
LC-70LE657U/LC-70LE655U/LC-70LE650U/
LC-70C6500U
2
1
1
AC outlet
■
LC-60LE657U/LC-60LE655U/LC-60LE650U/
LC-60C6500U
2
1
1
AC outlet
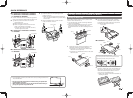
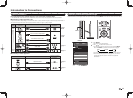
Bundle the cords properly with the cable tie.
• When bundling the cords, use the AC cord holder
mounted on the TV. Relocate from
A
to
B
.
■
LC-70LE857U/LC-60LE857U
A
B
2
1
1
2
1
1
Remove and loosen
Attach and bundle together
■
LC-70LE757U/LC-60LE757U/
LC-70LE755U/LC-60LE755U/
LC-70C7500U/LC-60C7500U
A
B
2
1
1
2
1
1
Remove and loosen
Attach and bundle together
NOTE
• TO PREVENT RISK OF ELECTRIC SHOCK, DO
NOT TOUCH UN-INSULATED PARTS OF ANY
CABLES WITH THE AC CORD CONNECTED.
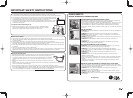
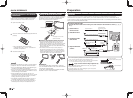
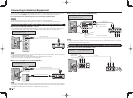
■
LC-90LE657U/LC-80LE657U/LC-80LE650U/
LC-80C6500U
1
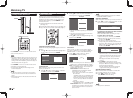
Confirm that there are 12 screws (8 long screws
and 4 short screws) supplied with the stand unit.
2
1
Set the post for the stand unit onto the
polystyrene foam.
2
Attach the base to the post.
3
Insert and tighten the 8 screws into the 8
holes on the bottom of the base.
• Hold the stand unit securely with one hand,
and then tighten the screws.
■
LC-90LE657U
FRONT
1
1
2
3
Long
screws
■
LC-80LE657U/LC-80LE650U/LC-80C6500U
FRONT
2
1
1
3
Long
screws
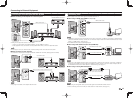
3
Build the work table. (See page 7.)
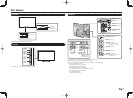
4
1
Insert the stand into the openings on the
bottom of the TV.
• Make sure that the stand is fi rmly inserted into
the TV. Improper installation may result in tilting
of the TV set.
2
Insert and tighten the 4 screws into the 4
holes on the rear of the TV.
1
2
2
1
Short screws Soft cushion
3
When turning on the TV for the fi rst time, press
POWER on the television.
POWER
4
Insert the batteries into the remote control unit.
(See page 10.)
NOTE
• Speakers cannot be detached from the TV.
• The TV angle cannot be adjusted.
Experiencing HD Images
An HDTV without an HD source is just an ordinary TV.
To enjoy HD images on the TV, you should get
HD programming from the following:
• Over-the-air broadcasting via HD quality antenna
• HD cable/satellite subscription
• HD compatible external equipment
NOTE
• For information on updating to HD programming, ask
your cable/satellite service provider.


Find Your Products By Category
Please Login
