
0
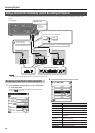
Owner's of the Roland MP3 Player Roland 8-Channel Recorder and Mixer gave it a score of 0 out of 5. Here's how the scores stacked up:


Recording/Playback
38
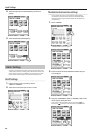
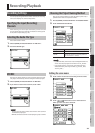
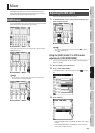
Marker
Here’s how to assign a marker within the project.
If you’ve assigned markers, you can quickly move to a previously
marked location during playback.
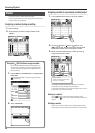
Assigning a marker during recording
1. Start recording.
2. At the moment you want to assign a marker, touch
<MARK>.
Assigning a marker to a previously recorded project
1. In the playback home screen (p. 10), touch <MARK>.
2. Use the [ ] button, [ ] button, [ ] button, and
[
] button to play, fast-forward, or fast-rewind to nd
the location at which you want to assign a marker.
3. When you’ve found the location at which you want to
assign a marker, touch <SET>.
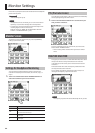
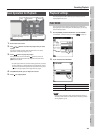
Marker indication
(number of markers passed/number
of markers in the project)
The number of markers will be shown. Markers are numbered
sequentially starting at the beginning of the project.
A maximum of 99 markers can be assigned. Repeat steps 2 and 3 to
assign markers at the desired locations.
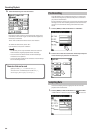
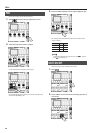
Moving to a marker
Touch < > to move to the marker that precedes the current
location. Touch < > to move to the marker that follows the current
location.
Deleting a marker
Touch <CLR> to delete a marker you’ve assigned. Markers will be
deleted starting with the marker that precedes the current location.
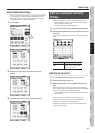
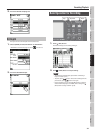
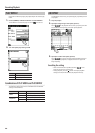
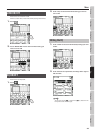
Using the [ ] (REC) button to assign a marker
If you’ve set REC BUTTON FUNCTION to “REC/MARK,” you
can also assign a marker by pressing the [ ] (REC) button.
A marker will also be assigned if you turn on the slate mic
during recording.
1. Choose [MENU]Ú<SYSTEM SETUP>Ú<REC BUTTON
FUNCTION>.
<REC BUTTON FUNCTION> is located on page 3/6. Touch
to access 3/6.
2. Touch <REC/MARK>.


Find Your Products By Category
Please Login
