
0
Owner's of the Canon Camcorder XF200 gave it a score of 0 out of 5. Here's how the scores stacked up:


Clip Operations
154
• If you selected [Select], use the joystick to move between the clips. Press SET to select a clip to copy and
repeat as necessary (up to 100 clips). After selecting all the desired clips, press the MENU button.
3 Select [OK] and then press SET.
• All the applicable clips on the selected CF card will be copied to the other CF card.
• Select [Cancel] instead to cancel the operation.
• While the clips are being copied, you can press SET to cancel.
4 When the confirmation message appears, press SET.
NOTES
• You cannot copy a clip if either CF card slot cover is open.
• If a clip is being copied to a card that already has a clip with the same number (the last 4 digits in the clip
name), the copied clip will be renamed with the following number.
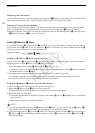
Deleting Clips
You can delete any clip except for MXF clips with an $ mark. To delete such clips, delete the $ mark
beforehand.
Deleting a Single Clip
1 Select the desired clip and then press SET to open the clip menu.
2 Select [Delete Clip] (MXF clips) or [Delete] (MP4 clips) and then press SET.
• You will be prompted to confirm the operation. For MXF clips only, the clip information will be displayed on
the screen as well.
3 Select [OK] and then press SET.
• Select [Cancel] instead to cancel the operation.
• While the clip is being deleted, the operation cannot be canceled.
4 When the confirmation message appears, press SET.
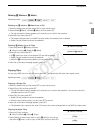
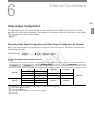
Deleting Multiple Clips
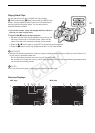
1 Open the [Delete] submenu.
[w Other Functions] > [Clips] > [Delete]
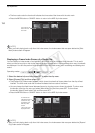
2 Select [Select] to select which clips to delete or [All] to delete all the
clips and then press SET.
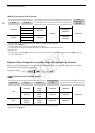
• If you selected [Select], use the joystick to move between the clips.
Press SET to select a clip to delete and repeat as necessary (up to
100 clips). After selecting all the desired clips, press the MENU button.
3 Select [OK] and then press SET.
• All the applicable clips on the selected recording media will be deleted.
• Select [Cancel] instead to cancel the operation.
• While the clips are being deleted, you can press SET to cancel.
4 When the confirmation message appears, press SET.
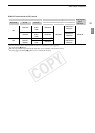
Operating modes:
[w Other Functions]
[Clips]
[Delete]
C OPY


Find Your Products By Category
Please Login
