
0
Owner's of the Canon Camcorder XF200 gave it a score of 0 out of 5. Here's how the scores stacked up:
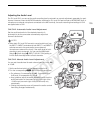

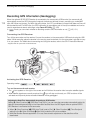
Adding Marks to MXF Clips while Recording
110
Adding Marks to MXF Clips while Recording
When recording MXF clips, you can flag an important shot in a clip by adding a “shot mark” (!). There are two
types of shot marks, shot mark 1 (") and shot mark 2 (#), and you can add either or both types to a single MXF
clip. You can also add an OK mark ($) or check mark (%) to the entire clip to flag clips you want to set apart.
When the camcorder is in mode, you can add or delete shot marks (A 157). You can also display an
index screen of all the shot marks (A 155), allowing you to find a particular scene in a clip more quickly.
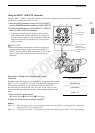
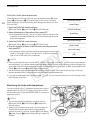
Adding Shot Marks while Recording
To add a shot mark to a clip while recording, you must first set in advance an assignable button to [Add Shot
Mark 1] or [Add Shot Mark 2].
1 Set an assignable button to [Add Shot Mark 1] or [Add Shot Mark 2] (A 129).
• To add both shot marks, set one assignable button to [Add Shot Mark 1] and another assignable button to
[Add Shot Mark 2].
2 While you are recording, press the assignable button at the beginning of the shot you wish to mark.
• A message indicating the shot mark will appear and the selected shot mark will be added to the current
frame of the clip.
NOTES
• Up to 100 shot marks (" and # marks combined) can be added to a single MXF clip.
• There may be up to a 0.5 second delay from when you press the button to when the camcorder adds the shot
mark.
• When you are using interval recording or frame recording mode, you cannot add shot marks to a clip.
• When an MXF clip contains either shot mark, ! will appear next to the clip’s thumbnail in the playback index
screen.
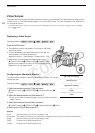
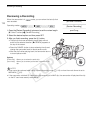
Adding an $ Mark or % Mark to the Last Clip Recorded
After recording an important MXF clip, you can add an OK mark ($) or check mark (%) to the clip to flag it and
set it apart. When the camcorder is in mode, you can display an index screen that contains only clips with
an $ mark or only clips with a % mark (A 146). Furthermore, you can use the $ mark to protect important
clips, as MXF clips with an $ mark cannot be deleted.
To add an $ mark or % mark to the last clip recorded in mode, you must first set in advance an
assignable button to [Add $ Mark] or [Add % Mark].
1 Set an assignable button to [Add $ Mark] or [Add % Mark] (A 129).
• To add both types of clip marks (to different clips), set one assignable button to [Add $ Mark] and another
assignable button to [Add % Mark].
2 After recording a clip, press the assignable button.
• A message indicating the clip mark will appear and the selected clip mark will be added to the clip.
NOTES
• A clip cannot have both an $ mark and a % mark at the same time.
Operating modes:
C OPY


Find Your Products By Category
Please Login
