

0
Owner's of the Canon Camcorder XF200 gave it a score of 0 out of 5. Here's how the scores stacked up:

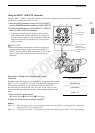
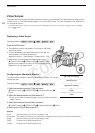


Recording Audio
102
Selecting the Microphone’s Low-Cut Filter
The setting is separate for the built-in microphone and for an external
microphone connected to the MIC terminal.
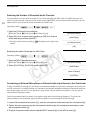
1 Open the [Int. Mic Low Cut] or [MIC Low Cut] submenu.
[¡ Audio Setup] > [Audio Input] > [Int. Mic Low Cut] or
[MIC Low Cut]
2 Select the desired option and then press SET.
Options
[Off]: For recording audio under usual conditions.
[LC1]*: For recording mainly people’s voices.
[LC2]*, [On]**: For reducing the background sound of wind when recording outdoors in windy surroundings (for
example, on a beach or close to buildings). Note that when you use this setting some low-frequency
sounds may be suppressed along with the sound of wind.
* Only for [Int. Mic Low Cut].
** Only for [MIC Low Cut].
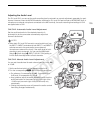
Selecting the Built-in Microphone’s Sensitivity
1 Open the [Int. Mic Sensitivity] submenu.
[¡ Audio Setup] > [Audio Input] > [Int. Mic Sensitivity]
2 Select the desired option and then press SET.
Options
[Normal]: For recording audio under usual conditions.
[High]: For recording audio at a higher volume (+6 dB).
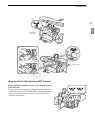
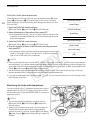
Activating the Microphone Attenuator
If the audio level is too high and the sound sounds distorted when
recording with the built-in microphone or an external microphone
connected to the MIC terminal, activate the microphone attenuator (12 dB
for the built-in microphone, 20 dB for an external microphone).
1 Open the [Int. Mic Att.] or [MIC Att.] submenu.
[¡ Audio Setup] > [Audio Input] > [Int. Mic Att.] or [MIC Att.]
2 Select [On] and then press SET.
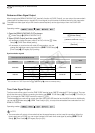
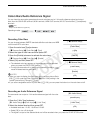
[¡ Audio Setup]
[Audio Input]
[Int. Mic Low Cut]
[MIC Low Cut]
[Off]
[¡ Audio Setup]
[Audio Input]
[Int. Mic Sensitivity]
[Normal]
[¡ Audio Setup]
[Audio Input]
[Int. Mic Att.]
[MIC Att.]
[Off]
C OPY


Find Your Products By Category
Please Login
