

0
Owner's of the Canon Camcorder XA25 gave it a score of 0 out of 5. Here's how the scores stacked up:

Wi-Fi Connection Using an Access Point
138
2 Within 2 minutes, touch [OK] on the camcorder’s screen.
• The camcorder will connect to the access point.
• You can touch [Stop] and then [OK] to interrupt the Wi-Fi Protected Setup while it is in progress.
• After the connection is established, continue using the function you were previously using. For
details, refer to the procedure in Playback on a Computer (A 134), Transferring Files to a
Computer or FTP Server (A 135) or Viewing and Changing Wi-Fi Settings (A 140), as
necessary.
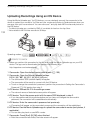
Searching for Access Points
The camcorder will automatically detect access points in the vicinity. After you select the desired
access point, you simply enter the password (encryption key) to connect the camcorder.
To enter text for the various settings, use the virtual keyboard (A 136).
1 Note the access point’s network name (SSID) and encryption key.
2 When the detected access points appear, touch [OK].
• You can touch [Í] and [Î] to go through the detected access points.
3 In the [Encryption Key] field, enter the encryption key and then touch [OK].
• If the access point selected in step 2 did not have a [C] icon, this step is not necessary.
4 Touch [OK] twice.
• After the connection is established, continue using the function you were previously using. For
details, refer to the procedure in Playback on a Computer (A 134), Transferring Files to a
Computer or FTP Server (A 135) or Viewing and Changing Wi-Fi Settings (A 140), as
necessary.
Manual Setup
Perform this procedure to manually configure the wireless connection settings. This may be necessary,
for example, if your access point’s network name (SSID) cannot be detected due to the stealth
function being enabled. Manual setup is for advanced users of Wi-Fi networks.
To enter text for the various settings, use the virtual keyboard (A 136).
1 In the [SSID] field, enter the SSID and then touch [OK] > [Next].
2 In the [Authentication/Encryption Method] field, touch [OPEN NONE] and then touch the
desired method.
• If you selected [OPEN WEP], the WEP index is 1.
3 In the [Encryption Key] field, enter the encryption key and then touch [OK] > [Next].
• In step 2, if you selected [OPEN NONE], entering the encryption key is not necessary.
4 Touch [Automatic] or [Manual] to select how to obtain the IP address.
• If you selected [Automatic], proceed to step 11.
5 For the [IP Address] and [Subnet Mask] fields, touch [0.0.0.0] and then touch [Í]/[Î] to
change the value and then touch [Next].
• Touch the next field to change the value, as necessary.
6 Touch [Next].
COPY


Find Your Products By Category
Please Login
