
0
Owner's of the Canon Camcorder XF300 gave it a score of 0 out of 5. Here's how the scores stacked up:

135
Playback
5
Clip Operations
Copying a Custom Picture File Embedded in a Clip
You can copy the custom picture file embedded in a clip to the
camcorder.
1 Select the desired clip and then press SET to open the clip
menu.
2 Select [Copy X File] and then press SET.
•The [X Data 1/3] screen appears with the orange selection frame
indicating the first custom picture file slot in the camcorder.
• Alternatively, you can press the CUSTOM PICT. button.
• You can push the joystick up/down or turn the SELECT dial to
display the [X Data 2/3] and [X Data 3/3] screens.
3 Push the joystick left/right to select the desired file slot and then
press SET.
4 Select [OK] and then press SET.
• The custom picture file already in the selected file slot will be
overwritten.
• Select [Cancel] instead to cancel the operation.
5 When the confirmation message appears, press SET.
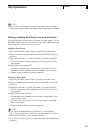
NOTES
• You cannot copy the custom picture file to a file slot with a protected
file.
• By default, file slots [C7] to [C9] are protected.
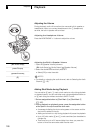
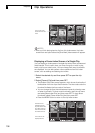
Displaying an Index Screen of Shot Marks
After you add shot marks to a clip, you can display an index screen that
contains all the frames in a clip with either shot mark, only the c mark or
only the d mark. When you play back a clip from this index screen,
playback will start from the frame indicated by the shot mark. You can
also perform other operations from this index screen, such as adding and
deleting shot marks.
1 Select the desired clip and then press SET to open the clip
menu.
2 Select [Shot Mark] and then press SET.
• The [Shot Mark] index screen appears, which contains all the frames
with shot marks in the clip. Select instead [Shot Mark 1] to display an
index screen only of the frames with the c mark or [Shot Mark 2] to
display an index screen only of the frames with the d mark.
• The time code under the thumbnail indicates the time code of the
frame with the shot mark.
• Press the INDEX button to return to the clip index screen.


Find Your Products By Category
Please Login
